Continuous Integration and Delivery with VSTS (Visual Studio Team Services)
Editorial Note
Having trouble writing or posting articles? These articles aim to gather together tips and tricks from authors and mentors to help you write great articles.
Introduction
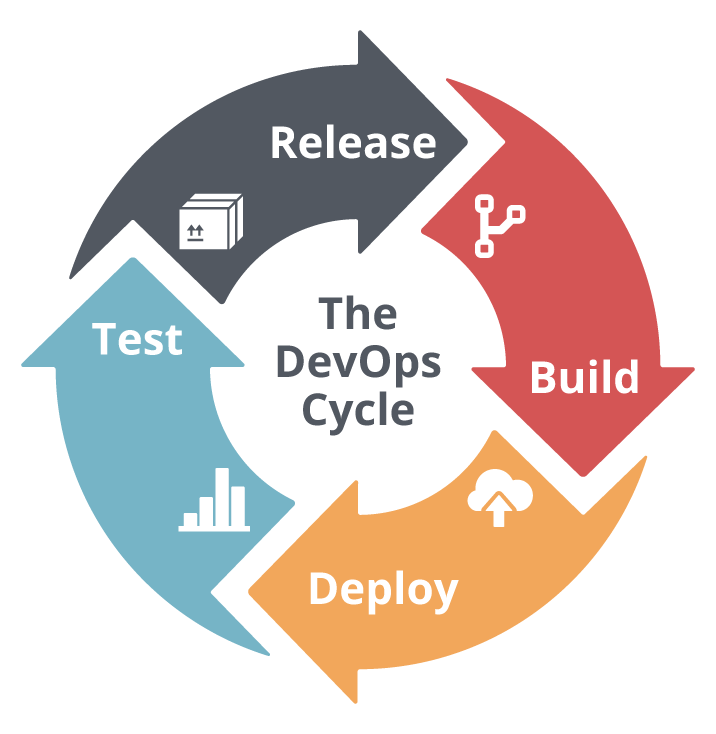
DevOps is a combination of software development and operation (Dev & Ops) which strongly advocate automation at all steps in software development process. This will enable faster delivery, more stable operating environment with minimum human errors, less maintain cost and many more advantages for software development team.
For example, how about your live deployment if you are building an enterprises level application which runs on 10 webservers with load balancer? So, the answer is here now !!
Earlier, DevOps is limited within a certain team that is named as DevOps engineers. But now it is time to start software engineers like you !!
Background
There are several tools available for continues integration and continues delivery. Jenkins and Visual Studio team service are more famous within those tools. In this article, I will focus on how to do this using VSTS with basic steps. In my next articles, I will focus on more advanced features in VSTS.
There are so many articles for Azure deployment using VSTS. But still few guidelines and articles for on premises deployment using VSTS. Therefore, I will focus on-premises deployments.
I assume that all of you are familiar with basic operations of Visual Studio team service including git repository maintain.
Pre-requisites
.NET 3.5 should be installed on the server because web deploy will use Msdeploy which requires .NET 3.5 to execute.
If this is still not installed, please run the below Powershell script in administrator mode.Hide Copy Code
dism.exe /online /enable-feature /all /featurename:NetFX3 /Source:D:\sources\sxs
Step 1 – Create Deployment Group
After you set up deployment group, it may have database server and web servers. Then we can install deployment agents in each machine. After that, it will enable parallel deployments.
First, navigate to the selected project in VSTS. Then open the “Build and release” tab and select new “Deployment Groups” as per the given image. Finally, create your own deployment group by clicking “Create“.
Step 2 – Install VSTS Agent in On-Premises Server
Just copy and paste this PowerShell script in on-premises server (PowerShell should run with administrator mode and make sure to mark “Use a personal access token in the script for authentication” before copying the script). It will generate a personal access token to validate and authenticate with the web server.
This is the script contain that needs to run, install and configure deployment agent whatever machine you need. Since this script has some GitHub URL, it needs to download and install some files on your on-premises server. Therefore, it should have an internet connection.
Once you run this script, Deployment agent will install to on-premises server and it will run and listen through windows services.
There will be few questions asked by PowerShell when you run the above code snippet.
First question for entering deployment group tags for agent – just enter few tags
Second question for entering user account for combination – use default account
Then move again to your VSTS account and check the “Targets” tab in your deployment group. Then you can see the tags you enter in on-premises server.
Finally, now your deployment group should be online if you follow these steps correctly !!
Step 3 – Configure Build Operation
In this step, we will configure first build in VSTS and this will mainly base on MsBuild.
Navigate to ”Build and release” section and select “Build” tab. Then create a new build as per the given image.
Select “VSTS Git” option (or relevant source control) and your team project.
Select ASP.NET as template in the next screen.
Now you will end up with basic features of ASP.NET web deploy.
But depending on your project requirements, these basic features will not be enough for you. If you need more features, you can search a suitable plugin from market place. (https://marketplace.visualstudio.com/vsts) Most of them are freely available now. Still, if you are unable to find a suitable plugin, you may write your own plugin.
In this article, I will use npm and grunt as additional features. Because in my project, I have used grunt for JS, CSS minification, create CSS file using less file and generate the above the fold content using penthouse to map Google speed insight requirements. (https://developers.google.com/speed/pagespeed/insights/)
So, I need some grunt commands with my build operation.
Since we are discussing beginners level, we will deal with most of the default features in this build process.
Select “Phase1” feature and then select “Hosted VS2017” as agent queue. You can rename Phase1 with any preferred name.
Other than that, build can be proceeded with these default values. Depending on the project requirement, you may alter the values.
As I mentioned above, I will add npm and grunt additionally to my build definition. Please note that this is an additional feature and you may not need to use this unless you are using grunt command in your project.
Just use command as “install” without npm.
Follow the same steps for install grunt and add the grunt command without “grunt” prefix. (Make sure to add “Grunt File Path” in the plugin)
Then you can reorder these individual tasks by dragging and dropping depending on your requirements. See the below image.

According to the image, you can see the build pipeline. Below tasks are configured in that pipeline and it will run one after another.
- Use NuGet – will install nuget to build server
- NuGet restore – will restore nuget with required packages according to package.config
- Npm install – will install
npm(optional) - Grunt production – will run
grunttask which was mentioned in configuration (optional) - Build solution – solution will build. You can use default “MSBuild Arguments” here.
- Test Assemblies – will run all unit tests. If you have any test project, please configure the paths here.
- Publish symbols path – will publish the project. Default values will able to publish your project.
- Publish Artifact – will create publish folder in this step. If you are interested, you can change path of publish or Artifact name (It will include variables and built project as a zip file). Anyway, default values will be able to Publish the Artifact.
Now you are almost done with the deployment process. Just save all settings and queue a new build and check whether it builds correctly. If there is an error, you have to debug and figure it out before continuing to the next step. If there is any error, just comment it below and I will help you figure it out.
Step 4 – Set Up the Release
Now it’s time to setup the first automated release. Move to “Build and release” tab and select “Releases” menu. Then select “Create release definition” and click “IIS Website and SQL Database Deployment” as per the given image.
Then you can enter environment name like beta or live, etc.
Then you will end up with release pipeline configuration menu. Select “Task” tab and you need to complete some configurations here.
Then you should select “IIS Website” as Configuration type.
Any name as Website name.
Your website app pool name as Application pool name as per the given image.
Then select “IIS Deployment” tab and fill it with mandatory fields.
Deployment group (Deployment group which you already created in the previous steps)
Enter tags if you are interested and just save the form with default values for rest of the fields.
Once you configure, move to “IIS Web App Manage” section.
- Configuration Type (IIS Website)
- Enter website Name (Any name)
- Action (Create or Update)
- Physical path (D:\Projects\Applications\TestApp, etc.)
- IIS Application pool (Current app pool details)
Now you are almost done with configuration. Just few more steps to enable continuous integration.
There are few additional tasks such as “Copy Files to: Backup“, “Archive $(Build.BackUpPath)” and “Run Sql Command“.
We will discuss these later in this article and they are not required for basic deployment.
Step 5 – Enable CI and CD
Select “Builds” from navigation and select “Edit definition” task as per the given image below:
Then select “Triggers” tab and just mark “Enable continuous integration” checkbox. If you are interested in enable disable this feature branch wise, you can do it here as well.
Once you enable this, it will automatically trigger when you commit to the particular branch.
Then you need to set the trigger for release. Then it will do the deployment on premises server.
So, navigate to “Release” menu and edit.
Then select pipeline tab and click “Continuous deployment trigger” icon as per the image.
Finally, enable the Continuous deployment. If you are interested, you can add the branch filters also.
Wow !! You just completed your first continuous integration project …
Now it’s time to test your first project. Please make a small change to your code and commit and wait until deployment completes. That’s it!
Some Tips You May Find Helpful !!
1. Please Use Variables as Much as Possible
It may be helpful for the long run and maintains for these configurations.
Variable available in “Build“and “Release configuration” tabs. Use variable prefixed with ‘$‘ sign.
e.g.: $(Build.ProjectPath)
2. Manage Connection String and Other web.config Variables
As per the above example, you just need to add connection string name as variable name and connection string as the value in release variable section. It will automatically replace the web.config values according to the variables.Hide Copy Code
<add name="umbracoDbDSN" connectionString="server=xxxx;database=yyyy;
user id=zzz;password='aaa'" providerName="System.Data.SqlClient" />
This is our web.config so,
Variable name => umbracoDbDSN
Value => server=xxxx;database=yyyy;user id=zzz;password='aaa'
3. Include Additional Folder to Deployment (Add Files to Build Artifact)
For example, if you need to deploy all files in “Content\minified” folder, but if it is still not deploying, open your .csproj file and add the following code (please change values depending on your requirement).Hide Copy Code
<Content Include="Content\minified\**\*.*">
      <CopyToOutputDirectory>Always</CopyToOutputDirectory>
</Content>
4. Backup File Before Deployment
Add “Copy Files” task to your release definition as per the given image. Then enter values as below.
- Source Folder (Your file path)
- Contents (Files which need to copy included in the above path e.g.: bin\*)
- Target Folder (Destination folder)
5. Backup Database Before Deployment
Add “Run Sql Command” task to your release definition as per the given image.
- Server Name (database instance name)
- Database Name (Your database name)
- SQL Command (Please change values)
Hide Copy Code
BACKUP DATABASE [yyyy]
  TO DISK = 'F:\SQLbackup\$(Build.BuildId).bak'
GO
SQL Server Login (data base user name)
SQL Server Authentication password (user password)
6. Configure Automatic Email Trigger for Approval
There is an option to pre and post deployment approvals. You can enter users or user groups here. If user group is added, only one person’s approval will be enough to complete the deployment.

Next Step
In this tutorial, we followed in the simplest way. In my next article, I will discuss more advanced features in continuous integration including how to write a custom extension to Visual Studio marketplace.
In addition, Jenkins is another solution to continuous delivery and integration. It is more flexible, more complex than Visual Studio. So, I will setup the same environment using Jenkins with my upcoming articles.


